Foundation
Early Photography
What's a Photogram?
A Photogram is a photographic print made by placing objects onto light-sensitive paper and exposing it with light from above. The surface of the photographic paper is coated with nitrate chloride, this causes the paper to turn black when exposed to white light.
A brief history of Photograms
First attempts to capture reality occurred in the 9th century, the Arabian scientist Alhuzen developed what is now known as a camera obscura.
1724 - Johann Heinrich Schultz discovered that certain silver salts, silver chloride and silver nitrate darken when exposed to light. He made a temporary photographic image using these silver salts on photographic paper with a coating of a silver compound.
1827 - Joseph Niepce managed to successfully fix a projected image from the view out of his window in La Gras, South France.

1839 - Louis Daguerre then worked with Niepce to help him fix the projected image. Together they came up with the Daguerreotype, this made a type of photograph which laterally reversed and monochromatic printed onto a metal plate. This produced a very high quality image however it could only be reproduced once.
Just after the Daguerreotype had been released William Henry Fox Talbot, an English scientist, developed another type of photograph called the Calotype. This term derived from 'kalos' which means beautiful in Greek and 'tupos' which means impression. Fox Talbot referred to his first Photograms as 'Photogenic Drawing'. The Calotype had a big advantage over the Daguerreotype in that the photographs could be reproduced. This was made possible by reproducing the images as negatives. But because of the use of paper as a negative it meant that the texture and fibers of the paper were visible in prints made from it, this meant the images lacked quality and looked grainy or fuzzy. So even though the Daguerreotypes could only be reproduced once they produced a much high quality image and therefore become more popular than the Calotype. However Fox Talbot improved the Calotype over time and because of advances in paper technology the process also became quicker and easier. Eventually the Calotype became the most popular type of photography that is this used today.
Just after the Daguerreotype had been released William Henry Fox Talbot, an English scientist, developed another type of photograph called the Calotype. This term derived from 'kalos' which means beautiful in Greek and 'tupos' which means impression. Fox Talbot referred to his first Photograms as 'Photogenic Drawing'. The Calotype had a big advantage over the Daguerreotype in that the photographs could be reproduced. This was made possible by reproducing the images as negatives. But because of the use of paper as a negative it meant that the texture and fibers of the paper were visible in prints made from it, this meant the images lacked quality and looked grainy or fuzzy. So even though the Daguerreotypes could only be reproduced once they produced a much high quality image and therefore become more popular than the Calotype. However Fox Talbot improved the Calotype over time and because of advances in paper technology the process also became quicker and easier. Eventually the Calotype became the most popular type of photography that is this used today.

How to make a Photogram
1) Using the enlarger put on the protective lens and turn on the light, the light should be red because of the protective lens. Put the light-sensitive paper into the light.
2) Make sure the lens is in focus and the right size, you can adjust the size by lengthening the height of the enlarger.
3) Now place your objects onto the the light-sensitive paper, translucent objects work well because the light can ravel through some parts of the object and not others.
4) Set the timer to 4 seconds, now turn off the red light (so there is no light) and remove the protective lens. Now turn on the white light and wait for the 4 seconds to finish.
5) Remove the objects from the light-sensitive paper and take the light-sensitive paper to the chemicals.
6) First put it in the first chemical, the developer, make sure the paper is fully submerged and leave it in the chemical for 3 minutes.
7) Now carefully remove your paper using the tongs and put it into the second chemical, the stop. Make sure it is fully submerged and leave it in there for 1 minute.
8) Carefully remove your paper from the third chemical, the fix. Make sure it is fully submerged and leave it there for 3 minutes.
9) Now carefully remove your paper from the fix and place it into the water for 5 minutes. Make sure it is fully submerged.
10) Finally carefully remove you paper from the water and place it into the dryer so it can dry, then carefully remove it at the other end.
The Camera Obscura
In the 17th and 18th centuries artists starting using a tool called the camera obscura (Latin for "Dark Room") to make precise drawings. The light would travel through the lens and project to show an inverted image which the artist could then trace to make a realistic and detailed drawing. At school we made simple camera obscuras using a cardboard box. We cut a small square in one side and then a much bigger square on the opposite side. We then stuck on tracing paper to the side with the larger square cut out. We pointed the lens of the camera obscura towards the light and used a magnifying glass on the lens to adjust the focal length. Once the image was in focus we traced the image on the tracing paper and then removed it from the box. Then we turned it so it wasn't upside down and added extra details.
In the 17th and 18th centuries artists starting using a tool called the camera obscura (Latin for "Dark Room") to make precise drawings. The light would travel through the lens and project to show an inverted image which the artist could then trace to make a realistic and detailed drawing. At school we made simple camera obscuras using a cardboard box. We cut a small square in one side and then a much bigger square on the opposite side. We then stuck on tracing paper to the side with the larger square cut out. We pointed the lens of the camera obscura towards the light and used a magnifying glass on the lens to adjust the focal length. Once the image was in focus we traced the image on the tracing paper and then removed it from the box. Then we turned it so it wasn't upside down and added extra details.
Movement
Using manual settings you can capture movement. For example to freeze action you can use a shorter shutter speed and to capture a blurred image of movement you can use a longer shutter speed. The shutter speed controls how long the lens is open, if it's open for longer more light is let in.
Using manual settings you can capture movement. For example to freeze action you can use a shorter shutter speed and to capture a blurred image of movement you can use a longer shutter speed. The shutter speed controls how long the lens is open, if it's open for longer more light is let in.
|
This first picture was taken using a long shutter speed and smaller aperture to capture the movement of the vehicles. I also edited this picture in Adobe Photoshop to make the colours more vibrant and contrasting. |

|

|
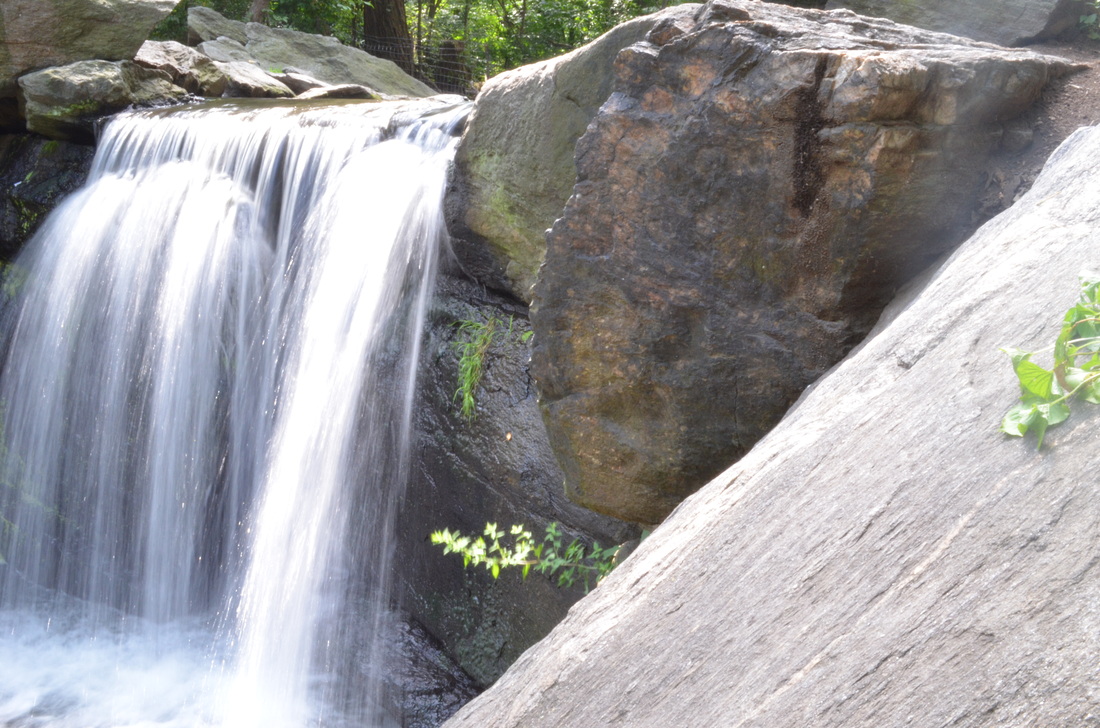
This picture was taken using a very short shutter speed. The lens was open for a very short amount of time, this is why you can see the droplets of water. |
|
This is a similar photo to the last one however I used a longer shutter speed, this meant the lens was open for a longer time and the water moved while the lens was open, creating this blurred effect. |
|
|
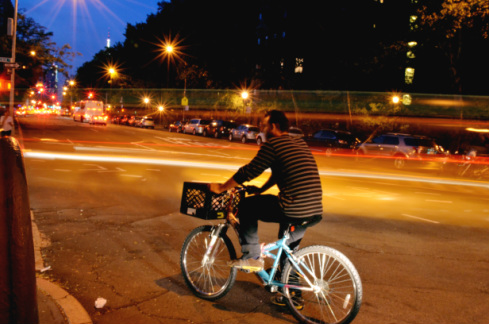
This picture was taken using a long shutter speed as the cars went past. Because the shutter was open for a long time you can see the lights on the cars as they go past. It was in the evening when I took the photo, this meant I could have the shutter speed open for a long time without the picture being over-exposed. |
|
I popped water balloons and tried to take the picture just as they popped so the water so in the air, but the balloon was gone. I used a very short shutter speed so you could see the water in the air before it fell to the floor. |
|


|
In this picture I used a long shutter speed to capture all the people walking around. However you can see a police man and a couple who didn't move in the time the lens was opened so they appear to be in focus and still while everyone else is blurred.
Times Square was very bright and the shutter speed was quite long so the picture was quite over-exposed in some areas. However I think the picture still looks nice because it's quite dark in some areas and very light in some areas which contrasts nicely and I think it comes together well. I find if you look at the picture for longer you start to see over things which were moving while the photo was taken, for example in the bottom right hand corner you can see people's feet walking across the road, but that is not obvious at first because you cannot see the rest of their bodies. I edited this picture in Adobe Photoshop to make the colours stand out more and contrast nicer. |
Aperture
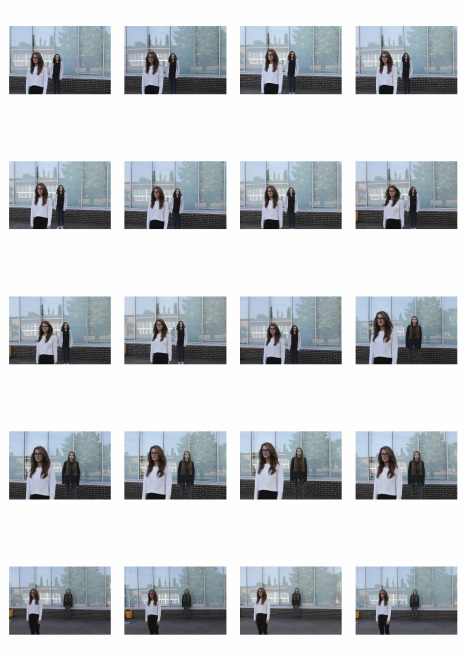
Here is a contact sheet of all the pictures I took, changing the aperture on each one. The aperture determines the size of the hole in the lens, changing it can affect whole light the picture is and the depth of focus. We used Adobe Bridge to create a contact sheet full of our pictures.
The lower the f/stop—the larger the opening in the lens—the less depth of field—the blurrier the background.
The higher the f/stop—the smaller the opening in the lens—the greater the depth of field—the sharper the background.

